Categories
Storage

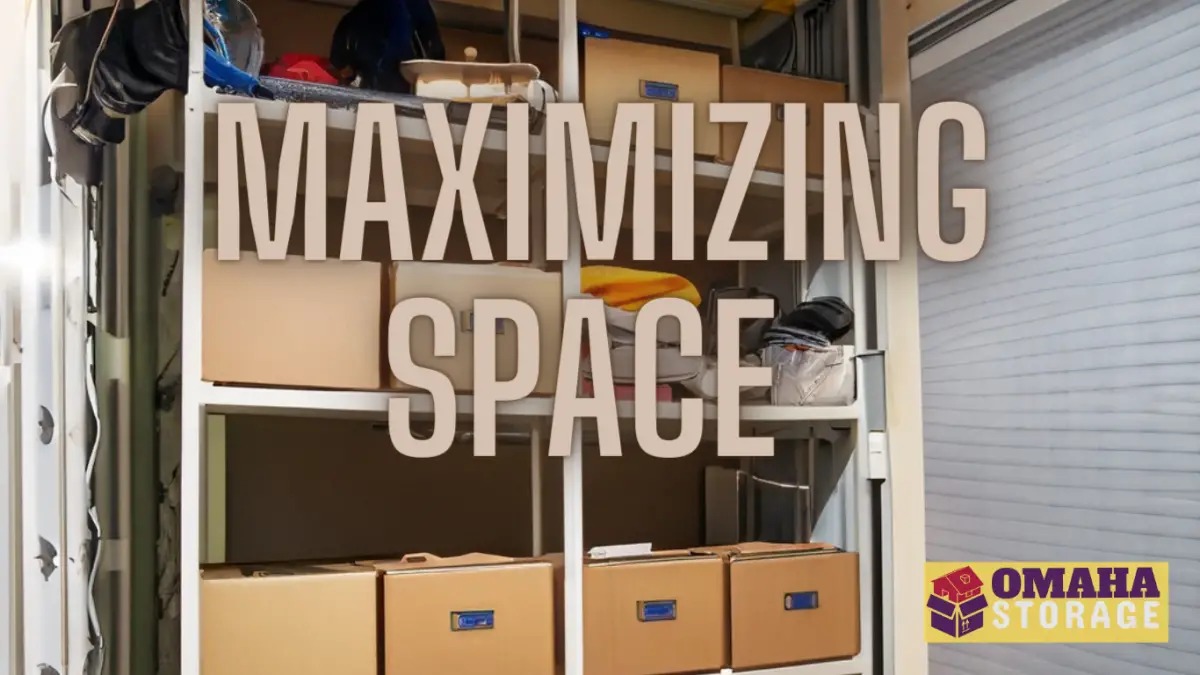
Eight Ways to Maximize Space in Your Storage Unit

In the world of storage units, there’s spaces where personal memories sit next to aspirations — where our own past mingles with the future.

In a way storage units are like personal time capsules They hold onto fragments of our individual lives just waiting for the day when we revisit them.

Today let’s talk about how to get the most items stored within these walls — and still make every inch count.

Understanding the Basics of Efficient Storage

Before we start stacking and packing, let’s go philosophical for a moment.

Efficient storage isn’t just about cramming things into a box. It’s an art, a science and sometimes, a little bit of magic.

The psychology behind clutter and organization

Our brains love order. It’s why a messy room can feel overwhelming. When things have a designated spot, our minds relax.

On the flip side, a well-organized space, where every item has its designated place, acts like a soothing balm for our minds.

It’s not merely about the physical space being tidy; it’s the mental clarity and calm that comes with it.

When our surroundings are in order, it’s easier for our thoughts to flow freely, allowing us to focus, think clearly, and feel at peace.

The importance of categorizing items

In a way, your storage unit is like a library. In a library, books aren’t just thrown on shelves. They’re categorized, making them easy to find.

Your items deserve the same respect. They should fit together nicely and have some order to them so you have a good place where to start looking for a specific belonging.

Spatial awareness and storage unit dimensions

Know your battleground. Understanding the dimensions of your storage unit is the first step in conquering it.

It’s like Tetris, but in real life.

Strategies for Maximizing Space

So let’s get into it.

Think vertically. Use the walls.

And remember, air is your enemy.

If there’s a void, fill it – but smartly. Don’t just throw things in. Plan, strategize, and execute.

Think of it like a jigsaw puzzle. Take some time to place each piece carefully, making sure it fits without being too crammed.

And then try to add a sorting order so it will be right where you expected to find your specific belonging when you return.

Organizational Tools and Accessories

Your storage unit’s efficiency and functionality hinge largely on the tools you employ within it.

Think of it as a master chef’s kitchen; the ingredients matter, but it’s the tools that transform them into culinary masterpieces.

In the realm of storage, we’re not talking about mere boxes and bins. Oh no, we’re diving into a world of ingenious solutions that can revolutionize the way you store.

And trust me, we’ve scoured the corners of the storage universe to bring you the crème de la crème of these tools.

Shelving solutions for vertical space

Why waste all that lovely air up there?

Shelving lets you stack upwards, freeing up valuable floor space.

Often you can find nice inexpensive shelves at Costco, Sam’s Club, Home Depot and Lowe’s.

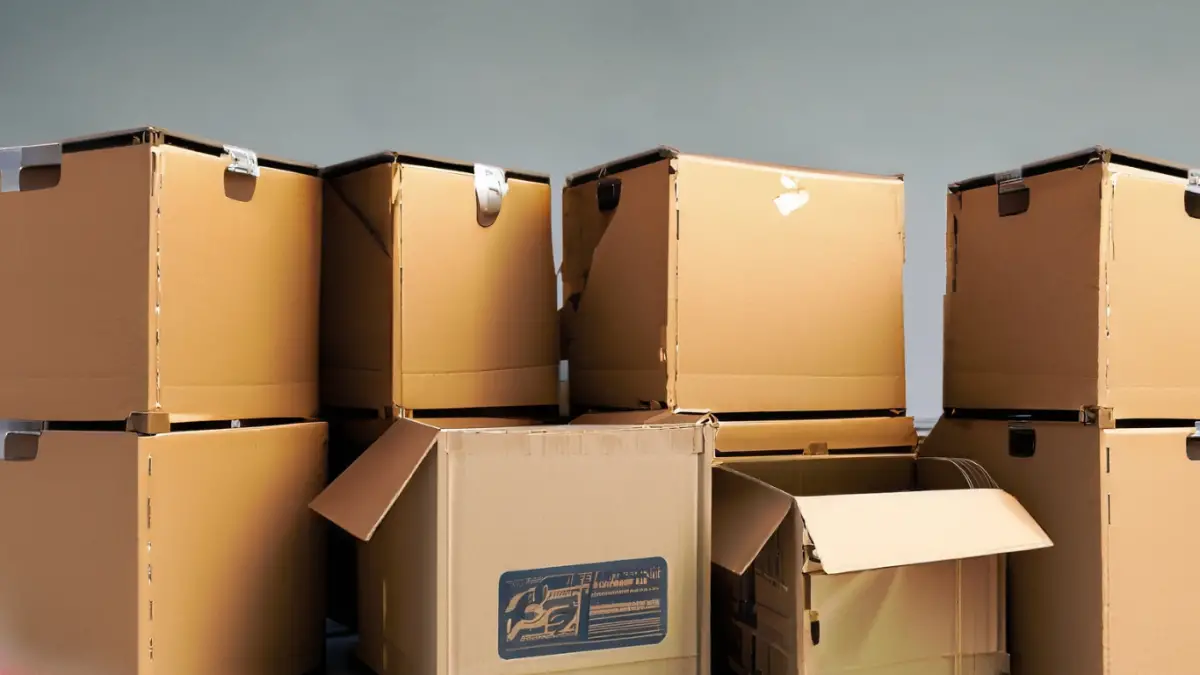
Bins and boxes ensure your bulky items remain protected and in place.

Bins, boxes and containers: The right ones

Not all containers are created equal.

Some are perfect for those heavy tools, while others are just right for those fragile and precious belongings.

Some containers boast rugged designs, built to withstand the weight of heavy tools, power equipment or stacks of old textbooks.

Those are the workhorses of the storage world, ensuring your bulky items remain protected and in place.

On the other hand, there are containers meticulously crafted for the more delicate treasures in our lives. Think of the containers with padded interiors or segmented compartments, ideal for cradling fragile Christmas ornaments, heirloom jewelry, or even those vintage porcelain figurines.

It’s all about matching the container to its contents, ensuring longevity and easy access.

Before you start packing, take a moment to assess what you have — and choose the container that’s up to the task.

Labeling systems for easy access

Ever spent hours looking for that one thing you KNOW you stored?

Labels are the secret weapon against that. They’re like a map to buried treasure.

As you place belongings into your storage unit, use a sheet a paper to map out where each item is in your storage unit. It’s worth the time.

Ensuring Easy Accessibility to Stored Items

It’s no use storing something if you can’t get to it. Make sure your frequently used items are within arm’s reach.

Compare this idea to the kitchen principle: you wouldn’t store your coffee mugs in the attic, would you?

Protection Against Physical Damage

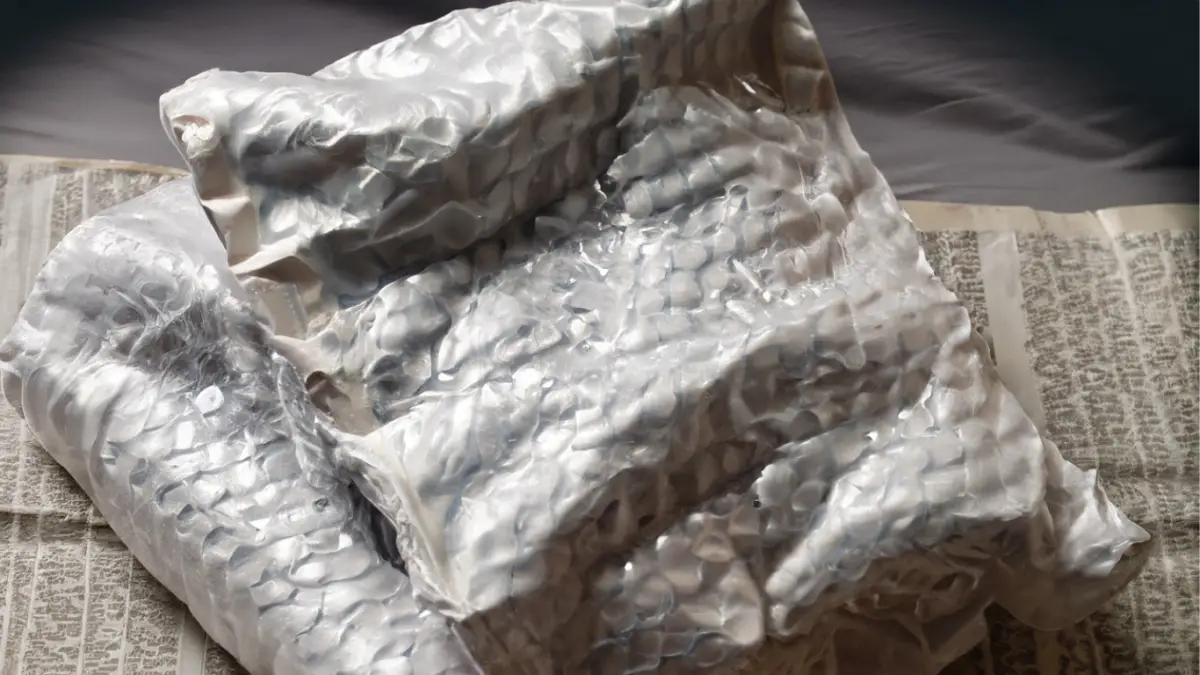
Bubble wrap, newspaper, old t-shirts — the list of potential packing materials is vast, but the goal remains the same: ensuring your items are snug, secure, and shielded from potential harm.

Each material has its unique strengths.

  • Bubble wrap, with its cushioning bubbles, is perfect for fragile items like glassware or ceramics.
  • Newspapers, easily crumpled, can fill voids in boxes, preventing items from shifting.
  • Old t-shirts, meanwhile, can wrap around objects, offering a soft layer of protection.
Bubble wrap and old newspapers
Bubble wrap and old newspapers.

But beyond the material choice, it’s the technique and care you employ that truly matters.

Tightly pack items, minimizing gaps and movement. This ensures that, even if the box is jostled, the contents remain unharmed.

Remember, when you’re packing for storage, it’s not just about maximizing space or fitting everything in. It’s about ensuring that when you eventually unpack, every item emerges in the same pristine condition you left it in.

This is when you invest a little time and thought into your packing process — your belongings will thank you for it later.

Combatting Moisture and Humidity

Moisture is the silent killer of storage units. It sneaks in, causing mold, mildew, and a host of other problems.

Silica gel packs and dehumidifiers are your best friends here. Some of the best dehumidifying packs can be found in the RV section at stores like Walmart and Ace Hardware.

Pest Prevention and Control

Nothing ruins the joy of opening a storage unit like finding a family of mice has made a home in your grandmother’s wedding dress.

Keep pests out with regular interval checks along with some basic preventative measures — such as making sure you don’t store food in the storage unit.

Routine Checks and Maintenance for Long-Term Storage

Out of sight shouldn’t mean out of mind. Regularly check your unit for any issues.

A small problem today can become a big one tomorrow if left unchecked.

Categories
Climate Controlled

How to Keep a Storage Unit Dry: Top Tips and Tricks for Optimal Moisture Control

Are you tired of opening your storage unit only to be greeted by the musty smell of dampness? What if your precious items have been ruined by moisture? Sadly… it can happen.

Today we are going to discuss how to keep storage unit dry as a bone.

As someone who has spent countless hours researching how to keep moisture at bay (I own an RV so it’s pretty much mandatory), I am perfectly poised to guide us through the labyrinth of dehumidifiers, silica packets and other mystical tools available for combating humidity.

If dampness in your storage unit causes you untold frustration every time you visit — then pull up a chair because we’re talking directly to YOU!

Understanding Humidity and Its Effects on Storage

In the quest to protect your precious possessions in a self-storage unit, understanding the dynamics of humidity is crucial.

The Science of Humidity

Humidity — it’s more than just weather talk. In layman’s terms, it denotes the concentration of water vapor present in the air reaching our self-storage units.

Air has a saturation point – beyond which moisture condenses into droplets. You’ve probably seen that morning dew on the grass when the air quality is just right. It happens in storage rooms too and that’s when we have storage problems.

How Humidity Affects Various Items in Storage

Humid environments can spell doom for arrayed items within storage spaces – from family photo albums discolored by mildew to devastating rust attacking metal antiques or electronic devices short-circuiting.

Let’s talk about steps to combat this unwelcome dampness.

Steps to Keeping a Storage Unit Dry

Let’s look at two factors that contribute to a damp or non-damp storage unit: temperature control and humidity reduction.

Choosing the Right Type of Storage Unit

Choose climate-controlled storage units, typically designed with insulated walls incorporating heating or cooling systems operational throughout seasonal fluctuations.

Cleaning and Preparing the Unit Before Storing Items

Before you start moving your items into the storage unit, it’s crucial to give the space a thorough clean.

This step is often overlooked, but it can make a significant difference in preventing mold growth. Use a mild detergent or a solution of bleach and water to clean the floors and walls, paying special attention to corners and crevices where mold-causing bacteria might be hiding.

Once the unit is clean, let it dry completely before moving your items in.

Maintaining Temperature Control within The Unit

Temperature control is a key factor in preventing dampness in your storage unit.

When temperatures fluctuate, it can lead to condensation, which in turn can cause excessive moisture build-up. This creates the perfect environment for mold growth.

To prevent this, try to maintain a consistent temperature in your storage unit. This might mean using a heater in the winter and an air conditioner in the summer.

The Importance of Air Conditioning or Heating Systems in Storage Units

Air conditioning systems do more than just cool the air. They also act as dehumidifiers, removing excess moisture from the air. This can be particularly beneficial in humid climates or during the rainy season when the risk of dampness is high.

On the other hand, heaters can prevent the condensation effect during colder climates. They keep the cold at bay, ensuring your items stay dry and mold-free.

Tips for Regulating Indoor Temperatures for Drier Environments

Investing in a smart thermostat can be a game-changer when it comes to maintaining a dry environment in your storage unit. These devices can be programmed to maintain optimum temperature levels, avoiding sudden swings that can lead to condensation.

Plus, many smart thermostats allow you to monitor and adjust the temperature remotely, giving you greater control over the conditions in your storage unit.

Preventing dampness in your storage unit is all about maintaining a clean, temperature-controlled environment. With a bit of preparation and the right tools, you can keep your belongings dry and safe from mold and mildew.

Remember, a little effort now can save you a lot of trouble (and damage) down the line when you know how to keep storage unit dry.

Categories
Billing

How to Stop Your Storage Unit from Going to Auction: Part 2

Just like everyone else who has a storage unit… You’ve tucked away your most prized possessions, convinced that they’re safe and sound.

Only to one day find out your precious cargo is on the brink of being auctioned off.

This is part two of my series on how to stop your storage unit from going into an auction.

I understand one’s stuff isn’t just ‘stuff’. It’s memories, investments and perhaps even heirlooms; losing them would be like losing a piece of yourself. The mere thought can send shivers down anyone’s spine.

You see my friend — whether you’re an ardent hoarder or someone dipping their toes into the whole ‘storage-unit-thingamajig’ for the very first time — this article is tailored precisely for YOU!

So sit back as we weave our way together through these tricky paths armed with wit (and wisdom!). Because when it comes to ensuring your prized possessions stay safely within arm’s reach – well let’s just say we are about become fast friends.

Understanding Your Storage Unit Contract

Let’s start here. Getting a storage unit involves signing a contract that contains crucial information concerning the implications of late or nonpayments. This document is vital, and you need to comprehend each detail within it.

Understanding this gives you an idea of what to expect should things go south.

Terms and Conditions of the Agreement

Each self-storage facility has unique terms and conditions, depending on their policies. Therefore, be keen on every clause outlined in your agreement.

By doing so, you can define available avenues when it comes to preventing auctions after defaulting payments.

Payment Schedules in the Contract

Within these agreements are stipulations about payment schedules: monthly or quarterly basis as commonly preferred by many facilities.

You should religiously abide by these timelines lest your belongings end up auctioned!

Implications of Defaulting on Payments

It’s also fundamental for tenants to know what happens if they default on their payments; an area often smoothly covered in most contracts but overlooked during signing sadly due to its ‘insignificant’ nature at that time.

Grace Periods for Late Payments

Also highlighted in these contracts are grace periods offered upon late payment which vary from one provider to another- being aware of this helps you plan accordingly.

Options To Prevent Auction If You Default on Payment

Several options exist when faced with potential auction scenarios due to defaulted payments.

Reaching Out To The Storage Facility Management

One immediate step would be getting in touch with the facility management indicating your financial predicament — they might just cut a deal!

  • Discussing Possible Payment Plans
  • Asking for Extended Grace Periods
  • Negotiating A Partial Payment Plan

You could arrange partial payments over time until settling the debt completely or even ask politely for an extended grace period!

If you’ve always been on time in the past, it’s likely they will grant you an extension. Sadly, with the economy currently, there are many people behind on their self storage payments. Getting an extension is seen as a way to keep people from falling too far behind.

Finding Financial Aid Or Loan Options

There’re organizations offering loans specifically tailored towards offsetting storage units balances: seek advice from local charities too who’d willingly chip into helping out.

Selling items From The Storage Unit To Settle Debt

Another unconventional yet viable solution lies here whereby selling some less valuable items recovers parts (or whole) unpaid balance hence calling off auction!

Consider Charitable Organizations Willing To Help. A pool of charitable bodies offer monetary assistance towards stopping imminent auctions!

Taking Legal Action Against an Impending Auction

Legal ways provide great alternatives against foreclosures like filing bankruptcy petitions halting all collection efforts instantly!

This creates room allowing renegotiations ultimately squashing possible auctions since now protected under bankruptcy laws!!

Filing For Bankruptcy As Last Resort Option

Filing for bankruptcy might sound drastic, but it can be a lifesaver when you’re staring down the barrel of an impending auction.

It’s like hitting the pause button on all collection efforts, including the auction of your storage unit.

But remember, this truly is a last resort option.

It comes with several consequences and should only be considered after consulting with a legal professional.

Preventing Future Auction Scenarios

Prevention is better than the cure. How can you prevent finding yourself in this situation again in the future?

Start by understanding the terms of your storage unit rental agreement. Know your payment due dates, late fee policies, and the facility’s auction process. Knowledge is power, and in this case, it’s the power to prevent future auction scenarios.

Maintaining Communication with Facility Management

Communication is key in any relationship, and your relationship with your storage facility management is no different. If you’re facing financial difficulties, let them know.

They might be able to work out a payment plan or offer other solutions. Remember, they’d rather get paid than go through the hassle of an auction.

Keep the lines of communication open and be proactive in addressing any issues.

Making Timely Monthly Payments

This might seem obvious, but it’s worth emphasizing. The best way to keep your storage unit possessions from going into auction is to make your monthly payments on time.

Set up automatic payments or reminders to ensure you don’t miss a payment. If you’re struggling financially, consider downsizing to a smaller unit or selling some items to cover the cost.

Facing the auction of your storage unit possessions is an extremely stressful experience. Especially when other people are counting on you for taking care of their stuff.

With the right strategies, you can navigate this challenge and come out on top.

Whether it’s taking legal action, maintaining open communication with facility management, or making timely payments, you have the power to change the course of events.

Remember… there’s no shame in seeking help. Reach out to a legal professional or financial advisor to explore your options and make an informed decision.

Categories
Billing

“How to Stop the Sale of a Storage Unit: Essential Guide & Advice”

Hey there fellow storage unit owner! Ever feel like you’re ready to pull your hair out over the constant cycle of sales and moving items in and out of storage units?

Let me tell you, I’ve been there… seriously.

I know exactly what keeps you up at night: The nagging thoughts about the cost involved with constant turnover — not just monetary but emotional as well.

The fears about making decisions that might not be best for your business.

You see, my friend (because after all these intense emotions we’re sharing here how could we not be friends?), there is always light at the end of every tunnel — even if it’s cluttered with forgotten furniture or dusty old vinyl records.

So whether you’re an experienced professional facing daily challenges or simply someone who’s tired from dealing with their overflowing garage — listen up!

Let’s talk about valuable insights and practical solutions tailored specifically for folks like us — who are tired of pulling out hairs over storage unit sales.

Prepare yourself for some enlightening knowledge bombs coming straight at ya — seasoned lightly with humor because hey…we’ve got to make sure nobody snoozes off half way,right?

Stick around as we delve into this important topic together – taking it apart bit by bit and finding dependable solutions along the way.

Understanding the Reason Behind Selling the Storage Unit

Whether you’re selling a small personal unit or a larger industrial one, the decision to sell isn’t usually made arbitrarily. There’s almost always an underlying reason.

The Initial Decision to Sell a Storage Unit

The reasons behind selling can be different for everyone; what may have seemed like the perfect investment opportunity could possibly turn out not as advantageous as initially expected.

Perhaps it was acquired due to increased storage needs which eventually decreased over time or perhaps financial situations changed and it turned into an unnecessary expense.

Economic Factors Influencing the Sale of a Storage Unit

Economic factors play an immense role in determining whether or not your self-storage unit will stay or go. With rental prices rising across the board, maintaining ownership of a storage facility could prove financially draining for some investors.

Alternative Solutions if Financial Hardship is Prompting the Sale

One way around this dilemma is exploring alternative solutions. These could include subletting part of your space, finding equity partners or utilizing unused sections differently to draw additional income streams.

Legal Aspects of Canceling a Storage Unit Sale

Not every sale process goes smoothly and at times there might arise circumstances where you need to backtrack on your decision but how do you legally retract?

Navigating Contractual Agreements Related to the Sale of a Storage Unit

Contracts are key players in any business transaction including selling off your self-storage units. Carefully reading through contracts helps identify clauses related specifically about cancelation options offering protection against potential lawsuits.

Exploring Laws and Regulations Pertaining to Cancelation Of Sales In Self-Storage Industry

Every industry has its unique set guidelines and laws when it comes transactions involving properties under their domain & yes that includes “self-storage.” Understanding these rules provides confidence when advocating for yourself.

Potential Legal Consequences or Penalties for Terminating a Sale Process Midway

Pulling the plug on a sale process midway isn’t a decision to be taken lightly.

It’s like stepping on a legal landmine that could explode with consequences. You could be looking at breach of contract claims, financial penalties, or even a tarnished reputation in the industry.

It’s a tightrope walk, and you need to tread carefully. Arm yourself with knowledge about the potential repercussions, and you’ll be better equipped to navigate this tricky terrain.

Reworking the Terms of Agreement with Prospective Buyers

There’s always room for negotiation. If you find yourself needing to back out of a sale, consider revisiting the terms of the agreement with the potential buyers. It’s about finding that sweet spot where both parties can walk away feeling satisfied.

Remember… communication is key. Open, honest discussions can pave the way for mutually beneficial solutions.

Main Elements to Consider When Reworking Terms with Potential Buyers

So, what’s on the negotiation table? Well, that depends on the specifics of your agreement. But a good starting point is to check if there’s an early termination clause. This could potentially save you a lot of headaches.

Other negotiable elements could include the price, payment terms, or even the timeline for the sale. The goal is to create a win-win situation for all parties involved.

Creative Negotiation Strategies to Convince Potential Buyers

Now, this is where you get to flex your creative muscles. Think outside the box. Could you offer a discount on the price? Or perhaps throw in some additional services for free?

The key is to make the deal attractive enough for the buyers to consider your new terms. Remember, a little bit of creativity can go a long way in turning a potentially negative situation into a positive one.

Tips for Amicable Dispute Resolutions over Canceled Sales Deals

Let’s talk about dispute resolution. It’s not the most pleasant topic, but it’s an important one. If disagreements arise over a canceled sale, aim for an amicable resolution.

Keep the lines of communication open, be respectful, and try to understand the other party’s perspective. Consider mediation or arbitration as alternatives to litigation.

And remember, today’s disagreement doesn’t have to mean a burned bridge. Handle the situation with grace and professionalism, and you’ll keep the door open for future opportunities.

Canceling a storage unit sale can be a complex process, fraught with potential legal pitfalls.

But with careful planning, open communication, and a dash of creativity, it’s possible to navigate this challenge successfully.

Always consult with a legal professional to understand your options and protect your interests. And remember, every challenge is an opportunity for growth.

Take a deep breath, roll up your sleeves and tackle this head-on. You’ve got this!

Categories
Climate Controlled

Understanding the Need for Cool Storage Units

We’ve all been there, haven’t we? That moment of dread when we open our storage unit to discover that the summer heat has turned it into an oven.

You’re left with a hot mess — and a heart sinking faster than your beloved vinyl records are warping in the sweltering temperatures.

The good news is, you don’t have to resign to this cruel fate! Today let’s look at keeping your storage unit cool during this current early record breaking summer.

You may not realize it yet, but maintaining the right temperature in these spaces plays such an essential role.

From preserving precious items like grandma’s antique furniture or important documents to protecting more everyday stuff like clothes or electronics; preventing heat damage can save you time, money and countless sentimental heartbreaks.

Don’t sweat it (pun intended) over how complicated this could  sound – it’s easier than trying to figure out which remote controls your TV after someone else has used it.

With years of proven expertise in tackling this very issue under my belt and hours upon hours spent on research for optimal solutions – believe me when I say — we’ve got this covered!

So buckle up buttercup as we embark on a journey filled with wisdom and practical tips and served up hotter than a freshly baked cookie from grandma’s kitchen– only without the risk of melting your stuff!

By turning what could be seen as chores into shared chuckles along with expert advice – together we’ll find ways to keep our cherished possessions safe from any unwanted heat waves bar-b-quing our possessions away.

Understanding the Need for Cool Storage Units

When it comes to storage units, temperature matters. It’s not just about comfort — it literally is about preservation.

Whether you’re storing antique furniture, important documents, or everyday items like clothes and electronics, maintaining a cool temperature can prevent heat damage and save you time, money, and heartache.

The Importance of Maintaining a Cool Temperature in Storage Units

Maintaining a cool temperature in your storage unit is crucial for several reasons.

First… preserving the integrity of your belongings. Heat can cause materials to expand and contract, leading to warping, cracking and other damage.

Second… a cool environment can prevent the growth of mold and mildew, which surprisingly will thrive in warm damp conditions.

Finally… certain items — such as electronics and certain types of artwork — require cool conditions to function properly and to maintain their value.

Effects of Excessive Heat on Stored Items

Excessive heat can have a variety of detrimental effects on stored items. For instance, it can cause wooden furniture to warp, crack, or dry out.

Paper documents and photographs can yellow and become brittle and shatter without you even being there.

Electronics can malfunction or become damaged, and certain types of artwork can fade or deteriorate.

Then there’s items stored in plastic containers where the heat causes the plastic to release chemicals, which can then be absorbed by the items inside.

Selecting the Right Kind of Storage Unit

Choosing the right kind of storage unit is the first step in ensuring your items are protected from excessive heat. This involves deciding between indoor and outdoor units, as well as climate-controlled versus non-climate-controlled units.

Deciding between Indoor and Outdoor Storage Units

While outdoor storage units can provide easy drive-up access, they are also more exposed to the elements, including heat.

On the other hand, indoor storage units are typically housed in a larger building, providing an extra layer of protection from extreme temperatures. However, accessibility might be slightly less convenient compared to outdoor units.

Evaluating Climate Controlled Units versus Non-Climate Control Units

Climate-controlled units maintain a consistent temperature and humidity level year-round, making them ideal for storing heat-sensitive items. Your storage center is expert on maintaining a consistent level and has had lots of practice here.

Non-climate-controlled units, while typically cheaper, do not offer this level of protection and can be subject to temperature extremes.

Strategies to Keep a Storage Unit Cool

Once you’ve selected the right kind of storage unit, there are several strategies you can employ to keep it cool. These include using insulation materials, ensuring effective ventilation, minimizing direct sunlight exposure and more.

Making use of Insulation Materials

Insulation materials can help to regulate the temperature inside your storage unit by reducing heat transfer. This can be particularly effective for outdoor storage units that are exposed to direct sunlight.

Tips for Effectively Insulating your Storage Unit

When insulating your storage unit, focus on the walls, roof, and door — as these areas are most prone to heat transfer. Reflective insulation materials, such as radiant barriers, can be particularly effective as they reflect heat away from the unit.

Different Types of Insulation Materials Suitable for a storage unit

There are several types of insulation materials that are suitable for a storage unit. These include fiberglass insulation, foam board insulation, and reflective insulation.

Each has its own pros and cons, so it’s important to choose the one that best suits your needs.

Radiant Barriers: What They are and How They Help in Cooling Down Your Space

Radiant barriers are a type of reflective insulation that can help to keep your storage unit cool. They work by reflecting radiant heat away from the unit, preventing it from being absorbed and causing the temperature to rise.

The Pros and Cons of using Radiant barriers

Radiant barriers are highly effective at reducing heat transfer, making them a great option for keeping your storage unit cool. However, they can be more expensive than other types of insulation and may require professional installation.

Installation Process

Installing radiant barriers involves attaching the material to the walls, roof, and door of the storage unit. This can be done using adhesive or fasteners, depending on the specific product and the structure of the unit.

The Impact Of Effective Ventilation

Effective ventilation can help to regulate the temperature in your storage unit by allowing hot air to escape and fresh air to circulate.

How Proper Aeration Contributes to a Cool Environment

Proper aeration can contribute to a cool environment by reducing humidity levels and preventing the buildup of hot air.

This can be achieved through natural ventilation, like opening windows or doors — or through mechanical ventilation, such as installing fans or vents.

Working Principle Of Different Ventilation Systems That Can Be Applied In Managing The Temperature

There are several different ventilation systems that can be applied to manage the temperature in a storage unit.

These include exhaust fans, which remove hot air from the unit; intake vents, which allow fresh air to enter; and air conditioning units, which cool the air and remove humidity.

Keeping Electronics at Minimal Use

Electronics can generate a significant amount of heat, so it’s important to keep their use to a minimum in your storage unit.

If you do need to use electronics, make sure they are properly ventilated and consider using a fan or air conditioner to help keep the temperaturedown.

Disadvantages and Care Needed When Dealing with Electronic Devices

While electronics can be necessary, they also come with some disadvantages. They can generate heat, which can increase the temperature of your storage unit. Additionally, they can be sensitive to high temperatures themselves, which can lead to malfunctions or damage.

Therefore, it’s important to take care when dealing with electronic devices in your storage unit. Ensure they are properly ventilated, keep them out of direct sunlight, and consider using a fan or air conditioner to help keep the temperature down.

Taking Advantage Of Natural Light

Natural light can be a great way to illuminate your storage unit without generating excess heat. Consider installing skylights or using a unit with windows to take advantage of natural light.

However, be mindful of direct sunlight, which can increase the temperature of your unit.

Minimizing Direct Sunlight Exposure

Isn’t it crazy how hot your car can get inside when parked out in direct sunlight? It doesn’t even have to be an especially hot day to get super hot inside your car. But when you park in the shade, it does make a difference.

While natural light can be beneficial, direct sunlight can cause your storage unit to heat up quickly. Consider the placement of your unit and the direction of the sun when choosing a unit.

If possible, opt for a unit that doesn’t receive direct sunlight during the hottest parts of the day.

Using Portable Air Conditioners or Fans

Portable air conditioners or fans can be a great way to keep your storage unit cool. They can be easily moved around to target specific areas, and they can be used as needed, helping to save on energy costs.

Process to properly set up either an air conditioning unit or fans

When setting up an air conditioning unit or fans, it’s important to consider the layout of your storage unit. Place the unit or fan in a location where it can effectively cool the entire space.

Make sure it’s not blocked by any items, and ensure there’s a power source nearby.

Using Solar Reflective Paints

Solar reflective paints can be a great way to reduce the heat in your storage unit. These paints reflect the sun’s rays, preventing them from heating up the surface they’re applied to.

Consider using these paints on the roof and walls of your unit to help keep it cool.

Planning and Arranging Items Strategically inside the Unit

The way you arrange your items can also affect the temperature of your storage unit. Try to create a layout that allows for good air circulation.

Avoid stacking items too closely together, and consider using shelving units to keep items off the floor and allow for better airflow.

Understanding what should go high, and what one should stay low

When arranging your items, consider their sensitivity to heat. Items that are more sensitive to heat should be placed lower to the ground where it’s typically cooler, while less sensitive items can be stored higher up.

Regular Assessment And Maintenance Checks

Regularly checking your storage unit can help you identify any issues before they become major problems. Look for signs of heat damage, check the functionality of your cooling systems, and make sure your insulation and ventilation are working effectively.

What part to inspect regularly?

Regularly inspect your insulation, ventilation systems, and any cooling devices you’re using. Also, check your items for signs of heat damage, such as warping, fading, or melting.

When is the right time to call in experts?

If you notice any major issues, such as a malfunctioning air conditioner or significant heat damage to your items, it’s time to call in the experts. A professional can help diagnose and fix the problem, preventing further damage.

Utilize Dehumidifiers to regulate moisture levels

Dehumidifiers can be a great tool to regulate moisture levels in your storage unit. High humidity can lead to mold and mildew, which can damage your items. A dehumidifier can help maintain a safe humidity level, protecting your belongings.

Benefits derived from maintaining appropriate humidity levels

Maintaining appropriate humidity levels can protect your items from damage caused by mold, mildew, and moisture. It can also prevent the warping , deterioration and expansion/contraction of materials — such as wood and paper — that can occur in high humidity.

Evaluating Digital Thermal Solutions

Digital thermal solutions, such as smart thermostats or temperature monitors, can help you keep a close eye on the temperature in your storage unit.

These devices can provide real-time temperature readings, and some can even send alerts to your phone if the temperature goes outside a set range.

Optimization with Smart Home Technology

Smart home technology can be a great tool for managing the temperature in your storage unit. Smart thermostats can be programmed to maintain a specific temperature, and smart plugs can be used to control fans or air conditioners remotely.

Apps that could help monitor temperatures remotely

There are several apps available that can help you monitor the temperature in your storage unit remotely. These include smart home apps, like Nest or Ecobee, as well as standalone temperature monitoring apps.

Energy efficient practices within your storage units

Energy-efficient practices can help keep your storage unit cool while also saving you money on energy costs. These practices might include using energy-efficient cooling devices, like Energy Star-rated air conditioners or fans, and implementing energy-saving strategies, like using natural light instead of artificial light.

Easy tips that can save power without compromising cooling requirements

There are several easy tips that can help you save power without compromising your cooling requirements. These include turning off cooling devices when they’re not needed, using natural light instead of artificial light, and insulating your unit to reduce the need for cooling.

Efficient Power Supply Options For Cooling Mechanisms

When it comes to powering your cooling mechanisms, there are several efficient options to consider. These might include solar power, which can be a great renewable energy source for powering fans or small air conditioners, or using energy-efficient devices that use less power.

Steps in setting up solar panels as an alternative power source

Setting up solar panels as an alternative power source involves several steps. First, you’ll need to choose the right solar panels for your needs. Then, you’ll need to install them in a location where they’ll get plenty of sunlight.

Finally, you’ll need to connect them to your cooling devices.

Standby generators: how they work during sudden outages?

I’ve seen it happen several times… the heat outside is so extreme that a transformer at the power station spontaneously burns up and power is cut off for an hour — or longer.

If you have a climate controlled unit and the power goes off, yo might as well just have a standard uncontrolled unit.

That’s why standby generators make sense.

Standby generators can be a great backup power source during sudden outages. They work by automatically turning on when they detect a power outage, ensuring your cooling devices continue to run and keep your storage unit cool.
Categories
Insurance

Filing a claim with your self storage insurance company

You’ve carefully packed away your cherished possessions, those irreplaceable mementos and valuable items into a self-storage unit.

You’ve chosen a storage place with care, confident in its promise of safety and security. You’ve locked the door, walked away and carried on with your life — comforted by the knowledge that your belongings are being protected.

But then out of nowhere a disaster strikes. A raging fire, reducing everything to ashes. Or a sudden flood hits, placing your precious items into water. Or even a break-in, a violation of the one place you thought was impregnable.

The news hits you like a punch in the gut. Your heart sinks, your stomach churns and a sense of despair hits you. Those items weren’t just things; they were memories, personal items, pieces of your past maybe even your future.

Then you remember: You have self-storage insurance. Amid the chaos and the shock, this realization provides some hope. You have a safety net.

So you get a claim ready. It might seem like a daunting task, all the paperwork and technical jargon. You might feel overwhelmed, unsure of where to start or what to do.

Don’t worry. You’re not alone in this journey. We’re here to guide you through this process, step by step.

Join us as we help understand your policy, gather the necessary documents, fill out claim forms, and assertively follow up with your insurance company. You’ll get tips and advice to help you maximize your chances of a successful claim.

Recover what you can so you can move forward.

Understanding Your Self Storage Insurance Policy

Just like any insurance policy, your self-storage insurance is a contract. It’s a promise, a safety net.

To make it work for you, you need to understand:

  • What does it cover?
  • What are the exclusions?
  • The deductibles?
  • The limits?

It’s all in the fine print. Grab your policy and put on your reading glasses.

When to File a Claim

The question of when to file a claim with your self-storage insurance company is a crucial one. It’s like knowing when to sound an alarm.

When do you start? As soon as you discover a loss or damage.

Imagine walking into your storage unit and noticing that something’s wrong. Maybe it’s a water stain spreading across the box of your vintage comic book collection, or the shattered remnants of your grandmother’s antique mirror.

Perhaps it’s an empty space where your high-end mountain bike used to be. The moment you notice that something’s wrong, that’s your cue. That’s when you need to spring into action.

Timing is not just important; it’s crucial. Time is not your ally in these situations; it’s a ticking clock, counting down. Most insurance policies have a specific window for filing claims, a deadline. This could range from a few days to a few weeks, depending on your policy. If you miss this window — you might lose your chance to file the claim.

Don’t put it off til later. The moment you discover a loss or any damage, start the claim process. Document the damage, gather your evidence, and contact your insurance company. It might seem like a lot to handle, especially when you’re dealing with the shock of the loss. Remember… every minute counts.

Steps to Filing a Claim

Document the Damage or Loss

The first step is documenting the damage or loss. This is your chance to play detective and gather evidence. Take photographs or videos of the damage, make a list of the items that have been affected — jot down any details that might be relevant.

This documentation will serve as the foundation of your claim, proof that substantiates your loss.

Gather Necessary Documentation

Next gather necessary paperwork. This can include receipts or invoices for the damaged items, a copy of your insurance policy, and any other documentatoin that your insurance company might require. Think of this paperwork as the foundation of your claim — tangible evidence supporting your loss.

Contact Your Insurance Company

Once you have documentation and paperwork ready, it’s time to contact your insurance company. Report the loss or damage to them and initiate the claim process.

During this conversation, you’ll likely need to provide specifics about the incident and the extent of the damage. Honesty and clarity are key during this step.

Complete the Claim Form

The next step is filling out the claim form. It’s actually one of the most important steps in this process. The claim form is your official statement, basically a written account of the incident. It’s crucial to fill out accurately and thoroughly — providing as much detail as you can.

Follow Up on Your Claim

Once you’ve submitted your claim, it’s time to follow up. Sadly, you’ll probably have to follow up several times until the loss is compensated to you.

Follow up involves staying in touch with your insurance company, keeping track of the progress of your claim and providing any additional information required. Following up ensures that your claim stays on track and moves towards a resolution… even if it feels like it is crawling forward.

Each of these steps mentioned above is crucial. Each step you take gets you closer to your goal. Be motivated, persistent and know that “you’ve got this.”

Tips for a Successful Claim Process

Want to increase your chances of a successful claim?

Here are some tips…

Be proactive

Contact the insurance company first (and often) if you don’t hear anything for a few days.

Be organized

Have all your paperwork together and keep copies of everything you send for your claim. Also make journal notes of each phone call you have.

Be persistent

This goes along with being proactive. Keep at it and keep checking on your claim.

Be patient

Insurance claims are a marathon, not a sprint. Unfortunately it’s going to take time. Try not to get frustrated, try not to yell at anyone on the phone, try not to threaten any action. Any of these things could cause delays — or even cancellation — for your claim.

What to Do If Your Claim Is Denied

By this point, hopefully your claim has been approved and you have a check in hand.

If not, then let’s see what can be done.

Receiving a denial for your self-storage insurance claim can feel like a punch to the gut. You’ve gone through the process, followed the steps and now you’re left standing at a dead end.

But here’s the thing: a denial is not the end of the road. In fact, it’s very common and a normal part of the process. Think of it as a test of your resolve.

Granted it’s a setback, but it’s not a full stop. You have options. Main thing is to see what needs to be changed, and make fast adjustments and resubmit.

The first thing to do if your claim is denied is to understand why. Insurance companies are required to provide a reason for denying a claim. It could be due to a lack of coverage, insufficient documentation or even a simple clerical error.

One of your options is to appeal the denial. This involves writing a letter to your insurance company, stating your case and providing any additional information or documentation that could support your claim. It’s your chance to argue your case, to present new evidence and plead for a reconsideration.

Another option is to negotiate with your insurance company. Sometimes a claim can be denied because the cost of damage is less than your deductible — or because the insurance company disputes the value of those damaged items.

This is a chance where you might be able to negotiate a settlement that’s acceptable to both parties.

You also have the option of seeking help from a third party. This could be a lawyer, a public adjuster or your state’s insurance department. These professionals can provide advice, assist with the appeal process, and in sometimes mediate between you and the insurance company.

The main thing is a claim denial is not a brick wall. It’s a detour, a redirection. Take a deep breath, regroup and come up with your new plan of action.

With the right approach you can turn that denial into an approval.


Categories
Antiques

Guide to Storing Antiques and Collectibles in a Storage Unit

Antiques and collectibles are more than just objects; they’re time capsule mementos — each carrying a piece of history that’s as unique as it is precious.

Preserving these treasures isn’t as simple as stashing them in a corner of the attic. Treasured memories require careful thought, meticulous preparation and a keen understanding of needs.

We put this guide together to be your personal roadmap to storing antiques and collectibles — ensuring they’ll continue to tell their stories for generations to come.

Understanding Antiques and their Storage Needs

These items are often delicate, sensitive to temperature and humidity and susceptible to damage from improper handling. Understanding the needs is the first step in truly preserving antiques.

As you’ve likely found out, the value of antiques often goes way beyond their price tag. They’re fragments of the past, each with a personal story to tell.

With age also comes fragility. Antique furniture can warp (or crack), artwork can fade and ceramics can nick, chip or break. That’s why special storage considerations are warranted.

When preparing antiques for storage, first up is cleaning. Dust and grime can lead to damage over time, so a thorough (but gentle) cleaning is in order.

Next assess your items for any needed repairs. Hopefully they are just simple repairs. I’ve found a simple colored duct tape, bread bag twist ties and JB Weld glues can work quick wonders. If you don’t do the repairs prior to storage, the storing of damaged antiques may lead to further deterioration.

This is where the importance of using protective materials and containers can not be overstated. Bubble wrap, furniture covers, acid-free tissue paper and sturdy boxes are all essential.

Not only are you protecting your antiques from physical damage — you’re also creating a barrier from dust, pests and environmental issues.

Storing Antiques

I’ve found that the best place to store your antiques and collectibles is in a climate-controlled storage unit. And you probably already knew that.

Many people are aware that this will maintain a constant temperature and humidity level, providing an ideal environment for sensitive items. But they also offer protection against dust, pests and other threats.

Once you’ve chosen a storage unit, next comes proper organization. Organizing and cataloging your items will make it easier to find what you need and keep track of your collection.

This also helps prevent accidental damage caused by moving items around and saves time later on. Making a nice little map of your storage unit detailing “what is where” will be very helpful in the future. Believe me… I’ve been there.

When storing antiques, position can be everything. Try to avoid placing items directly on the floor, where dust and pests might get to them.

Instead use shelving or pallets to keep your items off the ground. Aim for the sturdiest shelves that fit in your budget.

On the other hand, never stack heavy items on top of fragile ones. Boxes and even plastic containers can collapse and it’s a recipe for saddening disaster.

Antiques Storage Tips

Storing antiques effectively requires a bit of know-how.

Here’s some tips to help you along the way:

Use correct materials

Acid-free tissue paper is great for wrapping delicate items, while bubble wrap can provide extra protection for fragile pieces. For furniture, consider using covers (or blankets) for added protection.

Avoid plastic

While it might be tempting to wrap everything in plastic for protection, this can actually trap moisture and lead to mold and mildew. I’m guilty of having done that in the past.

Instead see if you can find breathable plastic materials. This will also help for later on.

Label everything

But try not to generically label everything, be more precise than just having a box that says what room it’s from.

It’s easy to forget what’s in each of those boxes, especially if you’re holding a large collection.

Specifically label boxes and create an inventory that will help refresh your memory later on.

Check on stored items regularly

Even with the best storage conditions, it’s a good idea to check on your items regularly.

This allows you to catch any potential issues early and take necessary action.

For example, if a shelf collapsed or if moisture is seeping into your storage unit. You’ll want to identify and correct those as soon as possible.

Safe Storage for Antiques

As mentioned before, when it comes to antiques and collectibles, safety is paramount. Safety for your items, safety for you.

For your items… a climate-controlled storage unit is your best bet. These units maintain a consistent temperature and humidity level, keeping your devices safe from the elements.

For the safety of you, try to make a pathway through the middle of your unit so you can access and see everything on the sides.

Consider the positioning of any electronics. Avoid placing those directly on the floor where they can be vulnerable to dust and pests.

The nice thing about a climate-controlled storage unit is that it takes the guesswork out of maintaining the right conditions.

It’s like having a personal caretaker for your antiques, one that’s on duty 24/7. But remember even the best caretaker can’t protect your items if they’re not set up properly.

Positioning can be like setting up a mini-museum. You wouldn’t stack priceless artifacts on top of each other in a museum, would you? Imagine how that would look… the same principle applies here.

Avoid placing items directly on the floor, where they’re more susceptible to dust, pests and potential water damage.

Use pallets or shelving to elevate your items. The main point being… don’t stack heavy items on top of fragile ones.

Climate Control for Antiques

You may be thinking… “is it worth the added expense of Climate Control?”

Climate control isn’t a luxury when it comes to storing antiques; it may be a necessity. And if you talk to your storage center, they can usually cut you a deal on Climate Control that doesn’t cost much more than standard self storage.

The thing is that antiques are sensitive to changes in temperature and humidity. Too much heat can cause warping and cracking — while too much humidity can lead to mold and mildew. Overly dry conditions can cause wood to split and crack.

So it basically comes down to the reason why you’re storing these items. That reason will provide your answer as to what budget you find to be appropriate.

The ideal temperature for storing antiques is around 50-75 degrees Fahrenheit, while the ideal humidity level is around 50-55%.

A climate-controlled storage unit should maintain these conditions year-round, providing an optimal setting for your antiques.

Packing Antiques for Storage

Packing antiques for storage is a delicate process. Each item needs to be handled with care and given the proper protection.

Here are some reminders to keep in mind:

Materials

As mentioned above, plenty of bubble wrap, packing peanuts and sturdy boxes are essential supplies. For delicates, consider using acid-free tissue paper.

Provide plenty of padding

Antiques should be snug in their boxes, with plenty of padding to prevent movement. Remember, moving around inside leads to damage.

Don’t overload boxes

It’s better to use more boxes with less in each one than to cram everything into a few boxes. This helps prevent damage from items shifting or boxes being too heavy and crushing the boxes below.

Long-term Antiques Storage

Storing antiques long-term requires some extra consideration. If you’re planning to store your antiques for an extended period, you might want to consider professional storage solutions.

These services can provide the optimal storage conditions and give you peace of mind. They also often offer additional services, such as transportation, packing and insurance.

The key to successful long-term storage is also regular maintenance. Even in the best storage conditions, it’s a good idea to check on your items regularly, clean the storage unit, and refresh any protective materials as needed.

Storing antiques and collectibles may seem daunting, but with the right knowledge and preparation, it’s a task that’s well within your reach.

The goal is to preserve the history and value of your items for years to come. Especially if you have family members and relatives breathing down your neck, wondering… “what are you doing to take care of our family treasures?”

I know, it’s a lot of stress. Having good storage (if you don’t have room at home), can remove some of that stress.

Take the time to prepare items properly, choose a good storage unit and follow the best practices above for packing and storage.

Your antiques and collectibles are more than just objects; they’ll remain pieces of history. And they deserve to be treated as such.

For further reading about handling antiques…

  1. National Geographic – How to Store Antiques – Anchor Text: National Geographic’s Guide on Storing Antiques
  2. The Spruce – Storing Antiques – Anchor Text: Tips on Storing Antiques from The Spruce
  3. StorageCafe – A Guide To Storing Collectibles – Anchor Text: StorageCafe’s Guide on Storing Collectibles
Categories
Storage

Storing Electronics in a Storage Unit

In this digital age… our lives are intertwined with electronics.

From laptops to gaming consoles, these devices not only provide entertainment but are often essential for work and communication.

However when it comes to storing these valuable items — many of us are at a loss.

Sadly… improper storage can lead to damage, rendering electronics useless. Today we’ll walk you through the ins-and-outs of storing electronics safely and efficiently.

Understanding Electronics and their Storage Needs

Think of your electronics as the divas of the inanimate world. They’re a bit finicky, a tad high-maintenance, and they don’t play well with the likes of extreme temperatures, humidity, or dust.

These seemingly harmless elements are the arch-nemeses of your devices, capable of causing corrosion, wreaking havoc on internal components, and in the worst-case scenario, rendering your electronics as useful as a chocolate teapot.

What’s the secret to keeping these digital divas happy? It’s all about understanding their needs. And no, we’re not just talking about finding a cozy corner in your attic or basement to tuck them away.

It’s about crafting an environment that not only safeguards their functionality but also goes the extra mile to prolong their lifespan.

Imagine you’re creating a VIP lounge for your electronics. It’s exclusive, it’s protected, and it’s designed to cater to their every whim. That’s the level of care your electronics demand when it comes to storage.

Roll out the red carpet and treat your devices with the respect they deserve. After all, they’re not just gadgets; they’re the indispensable sidekicks that help you navigate your digital life.

How to Store Electronics

First things first, give your electronics a good clean. Dust and grime are like kryptonite to your devices, causing overheating and a host of other problems.

It’s like clogging your arteries with junk food – not a good idea.

Next remove the batteries. Over time, they can leak and cause corrosion, like a slow poison seeping into your device. It’s a silent killer that can be easily avoided.

Got any data on your device? Back it up. It’s like an insurance policy for your information. You hope you’ll never need it, but you’ll be glad it’s there if you do.

If you’ve got the original packaging for your device, use it. It’s like a tailor-made suit, designed to protect your device from the trials and tribulations of storage.

This can help… U-Haul’s Tips on Storing Electronics.

And last but not least, label your cords and accessories. It’s like leaving breadcrumbs for your future self. You’ll be thanking me later when you’re not faced with a tangled mess of cords and no idea what plugs into where.

Electronics Storage Tips

Storing electronics my friends, is a game. Not just any game, but one that harks back to those days of pixelated blocks and catchy tunes.

Yes, I’m talking about that magical stacking game of Tetris. It’s all about slotting each piece into place, creating a harmonious whole without causing any damage.

It’s almost like snuggly packing luggage for a trip, except on a larger scale.

Consider your cords. They’re like the long, straight Tetris blocks — useful but prone to tangling. Keep them organized with ties or zip locks.

Neatly stack those blocks, keeping everything tidy and manageable.

And don’t forget about the smaller pieces and instructions. They’re like those pesky Z and S-shaped Tetris blocks, easy to lose track of but crucial for success. Place them strategically into the open spots and crevices.

Let’s talk about padding. It’s your secret weapon, your power-up in this game of storage. Bubble wrap, packing peanuts, foam — they’re all here to protect your devices from shock and vibration.

It’s like having a force field around those Tetris blocks, shielding them from any accidental drops or bumps.

Safe Storage for Electronics

In the world of storage units, there’s a hierarchy. Not all storage units are born equal — and when it comes to your electronics, you want to be aiming for top tier.

That’s where climate-controlled units come in. They’re like the luxury penthouses of the storage world, offering a level of comfort and protection that’s a cut above the rest.

These climate-controlled units are the knights in shining armor for your electronics. They maintain a steady temperature and humidity level, creating a safe haven from the harsh elements outside. It’s like having your own personal weather system, keeping the climate just right — come rain or shine.

But it’s not just about the climate inside the unit. The positioning of your electronics within the space is equally important.

Think of it as feng shui for your storage unit. You want to avoid placing your devices directly on the floor. It’s a hot spot for dust and pests, and let’s face it, it’s not the most dignified place for your prized electronics.

Elevate your devices. Use shelving, pallets, or even a sturdy box. It’s about creating a space that’s not only practical but also respects the value of the items you’re storing.

After all, your electronics are more than just objects. They’re tools, they’re entertainment, they’re connections to the world. So, give them the storage solution they deserve.

Protecting Electronics in Storage

Storing your electronics isn’t a set-it-and-forget-it situation. Regular checks are essential to ensure that your devices are safe and sound. Be on the lookout for potential issues like mold and pests. Remember prevention is better than cure.

Packing Electronics for Storage

Packing, my friends, is not a task to be taken lightly. It’s not about cramming your electronics into a box and hoping for the best.

Instead imagine you’re a sculptor, and bubble wrap, packing peanuts, and other protective materials are your tools. You’re not just wrapping your electronics; you’re creating a protective cocoon, a shield against the bumps and jostles of the journey ahead.

Ensure your devices are secure, nestled snugly within their protective layers. But don’t let them get too comfortable. You don’t want them to have room to move around. It’s like a well-fitted suit, snug but not restrictive.

The goal here is simple yet paramount: to transport your electronics from point A to point B in one piece.

It’s not about the quickest route or the easiest method. It’s about the safest journey, the one that ensures your electronics arrive at their destination ready to power up and perform.

So, take a moment, channel your inner artist, and approach packing with the care and attention it deserves. Your electronics are counting on you.

Long-term Electronics Storage

When it comes to long-term storage, it’s a whole different ball game. It’s not a sprint, it’s a marathon, and just like any endurance race, it requires a bit more strategy, a bit more foresight.

If you’re looking down the barrel of an extended storage period, it’s time to bring in the big guns: professional storage solutions.

Think of these professional solutions as your pit crew in this storage marathon. They’re the experts, the pros, the ones who eat, sleep, and breathe storage.

They’ve got the knowledge, the tools, and the facilities to provide the optimal storage conditions for your electronics. It’s like having a personal trainer for your storage needs, someone who knows exactly what your electronics need to stay in peak condition.

But it’s not just about the physical condition of your devices. It’s about your peace of mind. Knowing that your electronics are in the hands of professionals, that they’re being cared for and protected, can take a weight off your shoulders.

It’s one less thing to worry about, one less item on your to-do list.

Frequently Asked Questions

Can electronics be stored in a non-climate controlled storage unit?

It’s possible but not recommended. Electronics are sensitive to temperature and humidity changes, which can cause damage over time.

How do you keep electronics safe in storage?

By cleaning them, removing batteries, using the original packaging, organizing cords, using padding and opting for a climate-controlled unit.

Is it safe to store a TV in a storage unit?

Yes, as long as it’s properly prepared and stored. This includes cleaning the TV, removing any batteries, using protective padding, and ideally, storing it in a climate-controlled unit.


Storing electronics doesn’t have to be a daunting task. With a little knowledge and preparation, you can ensure that your devices stay safe and functional, whether you’re storing them for a month or a year.

Remember, electronics are an investment. Protect them well, and they’ll serve you for years to come. So, go forth, store wisely, and rest easy knowing your electronics are in good hands.

Categories
Storage

How Hot Do Storage Units Get in the Summer

Consider this… it’s a mid-summer day where the sun is at its zenith, throwing down beams so hot it seems like the very air is on fire. The pavement underfoot is scorching, you can see heat waves rising from it.

Then you remember that in this intense heat, your cherished belongings are in self storage. They’re confined within metal walls bearing the brunt of the summer’s unyielding onslaught.

This evocative scene brings to mind a rather crucial question that many have pondered: How fiercely hot can storage units get during the sizzling waves of summer months?

With curiosity piqued, it’s time we look deeper into this. Unraveling the mystery surrounding this question is not only a scientific journey through the realm of thermodynamics — but also an exploration of the choices we make to protect valued belongings.

Let’s look deeper into the secrets of storage units when summer sun blasts in its full glory.

Thermometer Check: The Outside World Coming In

When the external thermometer nudges towards a sweltering 100°F (or 115°F in Phoenix), your storage unit isn’t tucked away in some cool corner, lapping up a refreshing breeze. Quite the opposite. Your things are braving the heat wave, rising in sync with the fiery outside world. Kind of like the internal heat of a closed up car in the sunshine.

It’s important to have an understanding how hot storage units can get during summer months. Just as we feel the burden of a scorching summer day, so does our humble storage unit, with its metallic walls absorbing the intense heat and its inside growing progressively hotter moment by moment. So what needs to be done…

Hot & Cold

Let’s continue on this heat-filled journey and explore a thought experiment. Imagine this: you have a valuable vinyl record collection – the kind that’s the result of years of careful curation and an unabashed love for music. You unfortunately decide to store this collection in a storage unit in Death Valley, California.

For the uninitiated, this place is the notorious melting pot that you’d imagine — boasting some of the highest temperatures on record. Will those vinyl records hold up?

On the other hand, picture a storage unit nestled within the frosty boundaries of Barrow, Alaska. This town holds its own claim to fame or should we say… infamy – it’s recognized for biting cold as a place where thermometers often hit below zero.

If we were to sneak a peek inside these two vastly different geographically located storage units during a summer day, the contrast in temperatures would be as striking as the climatic differences between the two locations.

The Death Valley unit could be experiencing a scorching 130°F – a temperature capable of transforming your vinyl records into unplayable, warped frisbees. Meanwhile the Alaskan cousin might be lounging at a rather congenial 60°F, providing your belongings a relatively comfortable refuge from the external chill. But in winter time, it’s the opposite between these locations.

The point of this exercise? To highlight the pivotal role the geographical location of your storage unit plays in the thermal narrative it experiences.

Depending on where your unit is situated, the toll taken by your possessions in terms of heat damage can swing dramatically.

The scorching heat of Death Valley or the chill of Barrow — each brings its unique set of challenges for items stored within their respective units and it’s essential to be aware of these influences.

The Melting Point of Stored Items

Rising mercury can hold certain items within your storage unit hostage, yielding a painful surrender to the intensity of the heat.

Among these items would be treasured vinyl records, those carefully preserved portals to nostalgic melodies. Subjected to extreme heat, they risk being forced into a devastating metamorphosis, and their once cherished tunes becoming silent, unplayable platters.

And what about those aromatic candles you so love? The ones that fill your space with a soothing scent and a soft, comforting glow? They could very well find themselves on the melting end of the heat spectrum, the blistering temperatures transforming them into a vibrant puddle of fragranced wax on the storage room floor.

This heat-induced narrative of ruin isn’t limited to just records and candles. Heat’s victims extend much further. Your high-tech electronics, your carefully crafted wooden furniture and even certain varieties of plastic – all of these items find themselves precariously positioned in heat’s crosshairs.

Heat is a formidable adversary to our treasured belongings.

The Impact of Sun Exposure

For these enclosed spaces, the summer sun’s rays are less of a delightful companion — and more of an unwelcome intruder that refuses to take its leave.

The sun’s exposure plays a substantial part in how temperatures inside a storage unit elevate. When a metallic storage unit comes face-to-face with relentless sun exposure, it’s not unlike cranking up the dial on your kitchen oven.

The sun’s rays become radiant energy trapped within the confines of the unit’s walls. It’s a process similar to the greenhouse effect on a mini scale. As the sun’s heat seeps in, it doesn’t find an easy exit, leading to an internal temperature that keeps climbing, like a loaf of bread steadily rising in a preheated oven.

While we might bask in the joy of a sunny summer day on the beach, your storage unit is left to wrestle with the intensifying and damaging heat.

A Breath of Fresh Air: Ventilation

If there’s one word that could play a heroic role for a storage unit during the sweltering summer it’s ventilation.

Consider a well-ventilated unit where air flows in and out, creating a breeze. This airflow can ward off some of the oppressive heat, providing a respite to the items within the unit. It’s literally a breath of fresh air, whispering promises of cooler conditions amidst the summer heat.

Heat and Construction Material

Think back to that one summer afternoon when you hopped onto a sun-kissed metal car seat. Quite a jolting memory isn’t it? A brief yet impactful reminder of the impressive heat retention capacity of certain materials. Storage units — just like that unforgiving car seat — bear the brunt of the summer sun in a similar manner.

Pay attention to the construction material of the unit. It plays a far more significant role than just serving as a protective shell for your possessions. Particularly when the material in question is metal, it transforms into a heat connoisseur, zealously absorbing and storing the sun’s warmth.

And what’s the end result of this fervent heat absorption, you ask? A storage unit that’s doing much more than safeguarding your belongings; it’s providing them with an unexpected sauna treatment. Your goods within this metallic box are slowly being baked in heat, not unlike vegetables in a slow-cooker.

Therefore it’s important to remember that while selecting a storage unit — it’s not just about the space, but also about the material. Choose wisely because the impact of this choice can reverberate through each item you entrust to the storage unit.

The Cure: Climate Control

So is there any recourse to save our belongings from relentless summer heat? The answer is a reassuring yes, and it comes in the form of two comforting words: climate control.

Climate-controlled storage units are an ingenious solution to the summer heat problem. No matter how the sun blazes outside, these units maintain a consistent temperature, usually hovering between a comfortable 55°F and 85°F.

This ensures your belongings are shielded from the brutal assault of the summer heat. Even for delicate items.

In these units, your vinyl records remain intact. Your aromatic candles hold onto their form. And electronics? They continue functioning without any heat-related glitches. Climate control can be the superhero your belongings need to combat the harsh summer months.

Climate-controlled storage units do come at a higher cost than standard ones. However, the investment is more like an insurance policy for your items. You protect them from potential heat damage, ensuring they survive the summer unscathed. And that kind of peace of mind? It’s priceless.

To circle back to our initial query – how hot do storage units get in the summer? As we’ve unraveled, the answer is intricately tied to several factors.

The external temperature, sun exposure, ventilation, construction material, and the presence (or lack) of climate control — all of these elements blend to tell the story of summer heat in a storage unit.

Armed with this insight, you’re now prepared to make informed decisions about storing your precious belongings, safeguarding them against the relentless grip of summer heat.

Because at the end of the day, the last thing you want is to open your storage unit and find a pool of melted candles and warped vinyl records where your treasures once were.

Frequently Asked Questions

How hot does a storage unit get?

The temperature inside a storage unit during the summertime can vary depending on the location, type of unit, and surrounding weather conditions.

The temperature inside a storage unit can easily hit over 100 degrees Fahrenheit (38 degrees Celsius) during a hot summer day, especially if the unit is not climate-controlled. In places like Phoenix, that temperature can climb to 120 degrees.

Metal and concrete are typically used to build storage facilities, and these materials absorb and retain heat.

However, in a climate-controlled storage unit, the temperature is typically kept between 55 and 85 degrees Fahrenheit (13-30 degrees Celsius) year-round, providing a much safer place for your temperature-sensitive items.

How to keep storage unit cool?

Keeping a storage unit cool during the summer can be a challenge, especially if not climate-controlled.

There are a few ways you can help reduce the heat:

Use a Climate-Controlled Unit

Opt for a climate-controlled storage unit. I know it sounds obvious, but these units maintain a consistent temperature and humidity level year-round — which can prevent heat damage to your items.

Insulate Your Unit

If you’re using a non-climate-controlled unit, consider adding insulation. This can help to reduce the amount of heat that gets into the unit. You can use bubble wrap, old blankets, or even foam boards to add extra insulation.

Ventilation

Ensure your unit is well-ventilated. Good airflow can help to reduce the buildup of heat. If your unit has windows or vents, make sure they’re open and unobstructed.

Avoid Plastic Covering

It seems like plastic covers can protect your items from dust, but they also trap heat. Instead use breathable fabrics like cotton sheets to cover your belongings.

Keep Items Off the Floor

Heat will rise so keeping belongings off the floor to help keep things cooler. You can use pallets or shelving to elevate your items.

Visit Your Storage Unit Often

Regular visits can help you check the temperature and make adjustments.

Extreme heat can damage many types of items — including electronics, wood furniture, and certain types of fabric.

If you’re storing these types of items, a climate-controlled unit is a better way to go.

Categories
Organizing

Master Your Storage Unit: Expert Tips for Saving Rent and Space Optimization

Are you tired of watching your storage unit rent skyrocket year after year? You’re certainly not alone.

I’ve seen one of my units cost 26% more now than it did a year ago.

I found out that many people deal with the challenge of organizing their storage units in a way that minimizes rental costs — while making the most of the available space.

Today let’s explore a variety of clever tips and strategies for trimming rent expenses while optimizing to the max.

Price frustration can happen to each of us

I still remember the day when I found myself staring at the mountain of stuff in my storage unit, feeling overwhelmed and frustrated. And… feeling tired.

The rent had been going up every few months, and it was becoming harder to justify the ongoing expense. I knew I needed a change.

As I began my quest for storage unit compression, I stumbled upon an auction selling some shelving units. I thought they would be perfect for organizing my storage space, but there was one issue: these were stationary.

After putting the shelves together, I realized that walking around them and getting to my belongings was still going to be a challenge. I needed something with a little more versatility.

One day in the garage while looking for a screwdriver, I noticed a bunch of casters collecting dust. I had forgotten about those. It was like a lightbulb went off in my head.

I thought, “Why not attach these casters to my shelving units and make them mobile?” It’s funny how I often repeat it… the house will provide, and there was the wheels that I needed to move those shelves around.

With the casters attached, I was able to line up the shelves back-to-back, creating a gap where I could easily roll them around to access my items.

My newfound mobility

This newfound mobility allowed me to use the space more efficiently.

And it also provided me with a solution to combat the increasing rent. With the mobile storage setup, I can easily move my belongings to a different unit when rent is too high.

I was no longer at the mercy of those frequent rent hikes. And if I can’t get a better rate at the same location, by myself I can rent a truck with a lift and transport my belongings to another storage facility.

In the end, my rent dropped to almost half of what I was previously paying, and the satisfaction of having a well-organized, efficient storage unit was priceless.

If you find yourself in a similar predicament, remember that there’s always a solution waiting to be discovered – sometimes, it’s just a matter of thinking outside the (storage) box. Remember… the house will provide.

The Heavy Bottom Rule: Stack Wisely

Picture this: You’re standing in front of your storage unit, looking in and seeing an assortment of boxes and totes, each filled with a variety of items – some light, some heavy.

How do you stack cardboard boxes efficiently while ensuring your safety? Enter the Heavy Bottom Rule – a tried and tested approach to stacking that’s both wise and practical.

The fundamental principle of the Heavy Bottom Rule is straightforward – always place the heaviest boxes and totes at the bottom of your stack.

By doing so, you create a stable foundation that prevents your stack from toppling over unexpectedly, protecting your belongings and yourself from getting hurt.

But the Heavy Bottom Rule doesn’t stop there. To further enhance the safety and stability of your storage unit, it’s essential to keep the height of your box stack in check.

Aim to stack boxes no higher than shoulder height. This not only reduces the risk of accidents while accessing your items — it also ensures you can comfortably and easily retrieve what you need without straining or overexerting yourself.

Label Everything: Making Life Easier

Imagine standing in your storage unit, surrounded by a wall of boxes and totes — each one a mystery waiting to be revealed.

You may find yourself spending precious time rummaging through countless containers just to find that one item you need. It’s a frustrating experience.

But there’s a simple solution to this all-too-common predicament – the power of labeling.

Begin by labeling all your boxes and totes clearly on the side, with the labels facing the aisle. This way, even when your boxes are nestled among other items, you can easily read what’s inside without moving or unstacking them.

By taking the time to label everything, you’ll know exactly where each of your belongings is located, transforming your storage unit into a well-organized, easily navigable space.

No longer will you waste precious minutes (or even hours) on fruitless searches; instead, you’ll be able to quickly locate and retrieve what you need, making life significantly easier.

Place a number on each box also. Then make a list sheet with each number and the box contents and on that list, map out where each box is placed inside your storage unit.

It’s little things like this that make all the difference and save a lot of time and frustration later.

Aisle Accessibility: Avoid Unnecessary Unloading

In larger units, leave an aisle that runs the length of the unit. I like to do this in the center of the unit — like having a pathway.

This allows you to easily access items at the back of the unit without unloading everything.

Trust me, you’ll thank yourself later when you need that one item you thought you wouldn’t need and its tucked all the way in the back.

Use Height to Your Advantage: Vertical Storage is the Answer

When it comes to optimizing storage space, it’s easy to focus solely on the horizontal plane, neglecting the vast potential that lies up above.

By embracing the concept of vertical storage, you can unlock a whole new dimension of organization and efficiency in your storage unit.

The key to mastering vertical storage is to make the most of the height available in your unit.

Stand tall items upright, such as ladders, skis, or large pieces of furniture, to maximize the space from floor to ceiling.

But be cautious when it comes to mattresses. Placing them on their end might seem like a clever way to save space, but doing so can lead to sagging and damage over time.

Instead, opt to place your mattress flat on top of your other belongings. To keep it protected from the elements, invest in a Life Storage mattress bag, which will shield your mattress from moisture, dirt, and dust.

And remember, resist the temptation to stack heavy items on top of your mattress; doing so can damage the springs and compromise the integrity of your once-comfortable sleeping surface.

Protect Delicate Items: Blankets and Towels for the Win

We all have those delicate, fragile treasures that need a little extra tender care when it comes to storage – whether it’s a piece of heirloom furniture, a prized work of art, or a beloved musical instrument.

The key to preserving their beauty and integrity lies in the simple — yet effective — use of blankets and towels.

Blankets and towels are more than just cozy household essentials; they can also act as protective barriers for your most vulnerable belongings.

By covering scratch-prone items with heavy blankets or thick towels, you provide a cushioning layer that can absorb any accidental bumps or knocks that might occur during storage or transportation.

Not only do these soft materials shield your precious possessions from scratches and scuffs, but they also help to maintain their overall condition, ensuring that they remain in tip-top shape for years to come.

It’s a small investment in time and effort that can have a significant impact on the longevity and appearance of your most treasured items.